
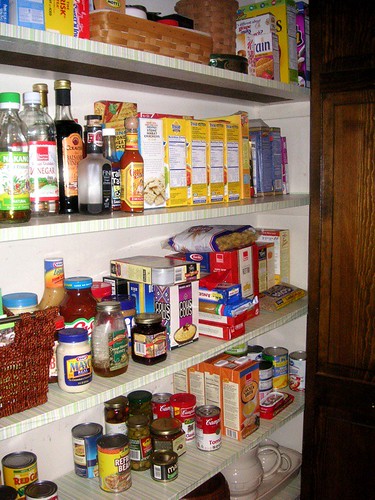
Unfortunately, the picture above doesn't capture the worst. I started by removing everything from the pantry, including the shelves, so I could really look at it. Our pantry had been thoroughly abused in our home's 25 year history. It's walls had never been painted, the shelves were covered in several layers of truly horrible vinyl shelf paper, the entire back wall was covered in stains from long-forgotten spills. I am also embarrassed to admit, upon closer inspection, dark spots where the wall meets the ceiling were not stains as initially suspected. They were dead bug carcasses. DEAD BUGS. I shudder thinking about it even now. I had to hoist myself on a ladder while I scraped their bodies out with a plastic knife, raining various dead bug parts down on myself.
After that little episode, I applied a coat of high hiding latex primer to the walls to cover up the stains. Then two coats of creamy white paint to match the newly painted doors and trim. I then gave some thought to the shelves. I could have added another layer of adhesive shelf paper. However, we had done that when we moved in and I was never very happy with it. I also considered covering them with brown butcher's paper, but that seemed a little boring. I finally decided to use fabric, specifically a great vintage sheet I picked up a couple of months ago.
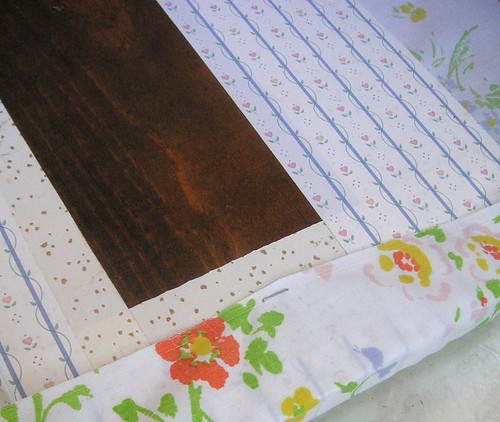
Covering a shelf is very straightforward. The only tools needed are a pair of scissors, a staple gun, and light duty staples.
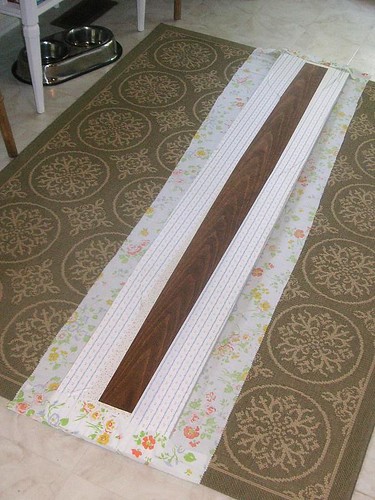
Lay the fabric face down on a flat work surface. Lay the shelf face down on top of the fabric. Put an anchor staple in the middle of all sides. This helps everything stay straight as you work. Work around the edges, stapling about every 2 inches, pulling the fabric taut. Fold the fabric under at the corners and staple down.
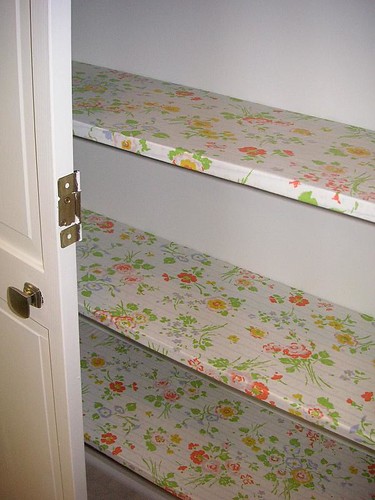
After covering all the shelves, I reinstalled them in the pantry. Much prettier!
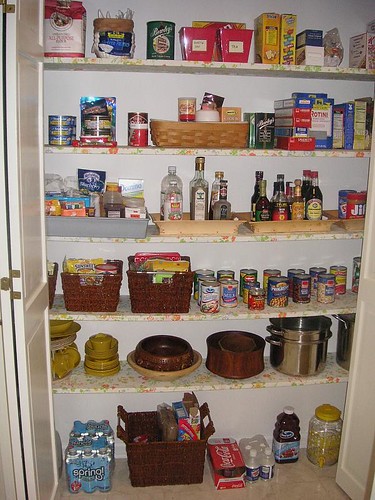
Here's the finished project. Since the fabric on the shelves isn't forgiving to spills, I put anything that might possibly spill or leave a mark in various baskets. This should prevent the fabric from getting soiled. I also grouped like items together so it's easy to find everything at a glance. My large roasting pan, which only gets used twice a year for turkey, holds all baking supplies. One basket keeps packets of spice rubs corralled, another holds small bags of dried fruit and nuts. A long skinny basket holds instant drink mixes. In all, it was an easy project that required only medium effort and now the husband and I get a pretty sight instead of an eyesore when we open the pantry doors.
No comments:
Post a Comment