Showing posts with label how to. Show all posts
Showing posts with label how to. Show all posts
Friday, June 25, 2010
FriDIY - Home Spruce Ups

This week's FriDIY features a few projects to spruce up things around the house. Like the cool lampshade above. Most home improvement stores sell hanging lamp kits (Ikea, too) and the rest of the materials are readily available and inexpensive. I'd love to see a bunch of these in coordinating colors hung from a portico for an outdoor party.

I love the curly ribbon wreath above. The directions are super easy to follow and I especially enjoy the summer-ready colors she chose. If I saw a wreath like this on a front door, I would just know I was going to have a good time in that house!

Finally, this project is one that would make the husband roll his eyes at me. He wouldn't be able to understand putting time and effort into making perfectly sized boxes. But I do, and luckily Sharilyn at lovelydesign does, too!

Friday, April 2, 2010
Fri-DIY Wallpapered Table

Spring has finally hit the South. It makes me want to open every window and change everything in the house. So, I can't help but love this DIY makeover from guest poster Abby Matthews over at Craftynest.
Happy Spring!
Friday, November 27, 2009
Fri-DIY
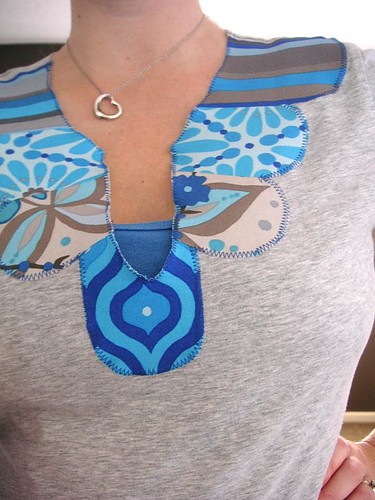
Remember this post where I waxed poetic about embellished tops? Well, I finally found a few hours to make one for myself. It wasn't too difficult and just took about an hour and a half. This could even be a no-sew project, but I zig-zag stitched around the exterior of the appliques just for fun. So, if you find yourself with some time to spare this holiday long weekend, try out this project and whip up a lovely new top for just a few dollars.
Materials:
1 T-shirt with a collar, in your size (mine came from the local thrift shop for $3.00)
7 6"x6" scraps of cotton fabric, any color
white paper
pencil
sharp scissors
paper-backed fusible webbing (I like wonder under)
iron
1 sheet white tissue paper
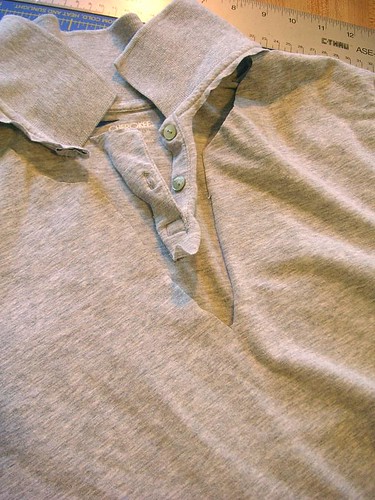
Step 1: Lay T-shirt out on work surface. Carefully cut out collar and remove. Try to make the cut as even and symmetrical as possible.
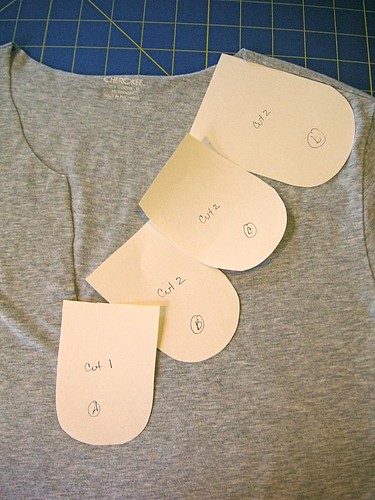
Step 2: Cut out templates for the appliques from the white paper. I used a rounded shape, but triangles or pointed shapes would work well, too. You will want 2 of each shape going down the neckline and 1 of the shape at the bottom of the neckline. Each one should be longer than needed so a little extra extends beyond the neckline. That part will be trimmed off later, Arrange them on the shirt to make sure they are big enough to overlap slightly around the new neckline.
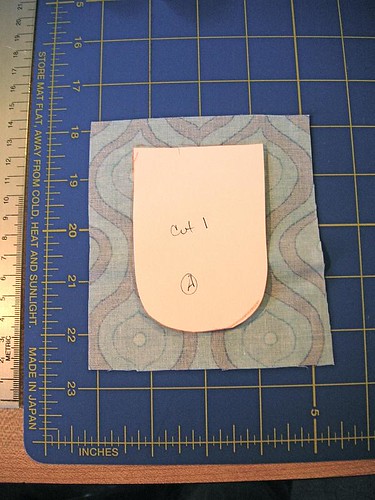
Step 3: Make sure the templates fit with a little room to spare on the fabric scraps. Trim the scraps into squares, leaving at least 1/2" border around the templates (this makes the next step a lot easier).
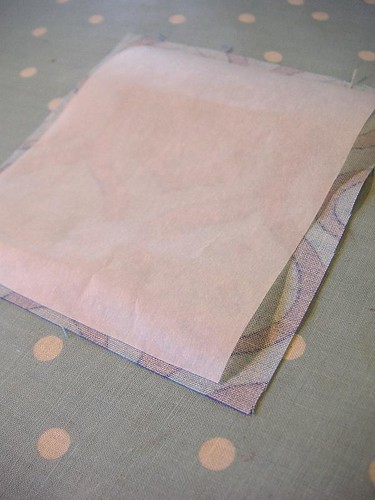
Step 4: Cut pieces of the fusible webbing slightly smaller than each of the fabric scraps. Bond to the fabric using the manufacturer's directions. Do not remove paper-backing yet! Trace each template onto the paper-backing of each fabric scrap, remember to do 2 of each coming down the neckline, and then cut out the shapes from the fabric. After each shape is cut out, the paper-backing can be removed.

Step 5: Lay T-shirt out on ironing board. Take the piece of tissue and place between the two layers of T-shirt at the neckline, making sure that the entire edge of the neckline is covered with tissue. This is to make sure nothing accidentally gets bonded to the back of the shirt.
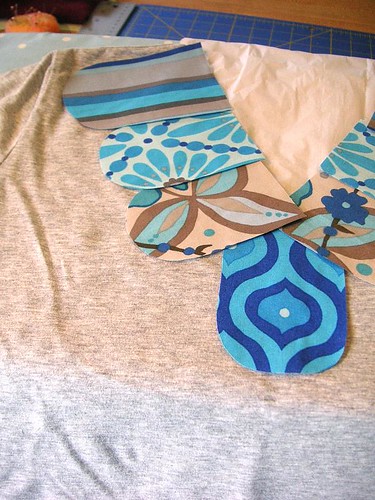
Step 6: Lay the webbing-backed fabric pieces along the neckline. No part of the T-shirt along the neckline edge should be exposed. Fiddle with them so they are symmetrical on both sides of the neckline.
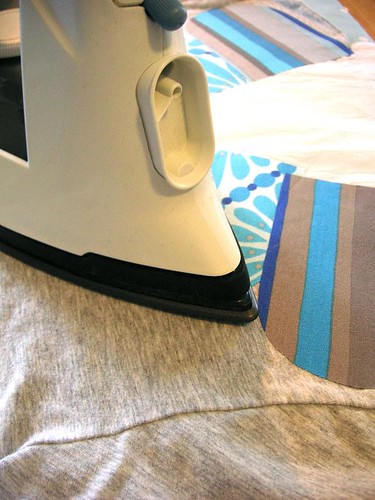
Step 7: Iron the pieces in place according to the fusible webbing directions.
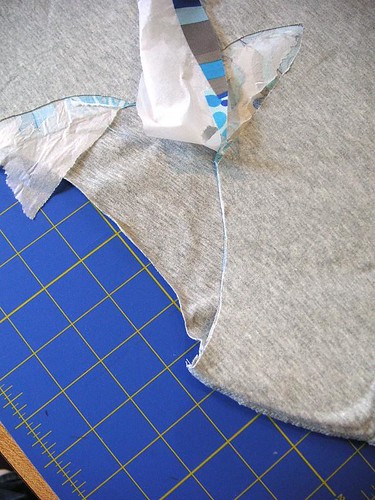
Step 8: Flip shirt inside out to expose the backside of the fabric pieces which have been bonded to the tissue. Rip the tissue so only the pieces actually adhered to the fabric remain. Carefully cut along the neckline to remove the excess fabric.
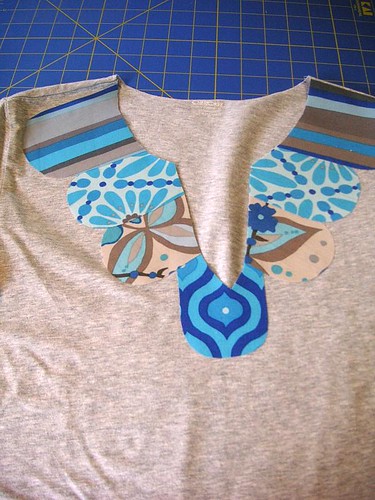
Step 9: Flip shirt right side out and all done! I did choose to zig-zag stitch along the neckline and around the appliques, but that's totally optional. Wear your new shirt with pride, just don't throw it in the washer or dryer. This baby is handwash and air dry only!
Tuesday, October 20, 2009
How To - Write a Thank You Note

With the holiday season nearly upon us, again, I thought a refresher in the art of writing a thank you note might be timely.
Thank you notes are dear to my heart. Growing up in my family, every gift received required a written thank you. Nothing else was done until the note was written, addressed, stamped, and mailed. Christmas mornings found my siblings and I crowded around the kitchen table scribbling out our thanks. Our poor toys spilled half opened from their boxes, just waiting for us to play...after the notes, of course.

I have proudly carried the tradition into adulthood. However, among the 30 and under age group, I have found proper thank you notes are not always a given. With the popularity of email and text messaging, it's easy to zip out a quick 'Thx 4 gift.' I am firmly of the opinion that taking the time and effort to write a real note is the only polite way to respond to a gift. Anything less, even if more convenient, is frankly rude.
The great thing is, writing a thank you note is EASY! A few quick lines, a stamp, and all done, politeness upheld. Plus, the amount of really beautiful, charming, even amusing note cards available is staggering. So grab a stack and a nice pen and let's get started.

First, when is a written thank you necessary? A thousand etiquette books will yield a thousand different answers. This is the rule I personally adhere to: If someone has gone out of their way to do something specifically for ME and spent time or money, I write a thank you note.
Now, there are a few exceptions. Thank you notes to significant others are not always required. I am not advocating taking gifts from husbands, wives, or boyfriends for granted, but those relationships are very intimate and I assume thanks are being given in different ways.

Host or hostess gifts do not require a thank you note. Every bottle of wine or bouquet of flowers received in exchange for a meal or party can be properly accepted and thanks given verbally on the spot. However, a guest at a party or meal should send a thank you to the host afterwards IF no small gift was brought to the gathering for the host. Or, just send one anyway because every host would love getting a note after a party expressing thanks. It's a nice thing to do.
At work, yearly bonuses do not require thank you notes. Tins of cookies or popcorn, especially if everyone gets one, do not require thank you notes. Gift cards, personal checks, tickets to a show or dinner out DO require a written thank you.

A thank you note should be written in ink, preferably in cursive, on a new card. A 'new' card may seem like a given, but I once received a thank you written on the back of another card that had been torn in half. Seriously. And don't use pencil, it shows a weakness of will.
Keep it short and sweet. I usually stick to the following template:
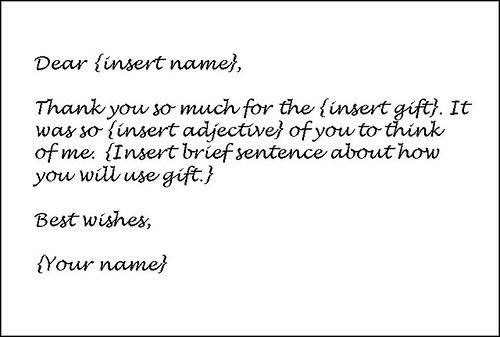
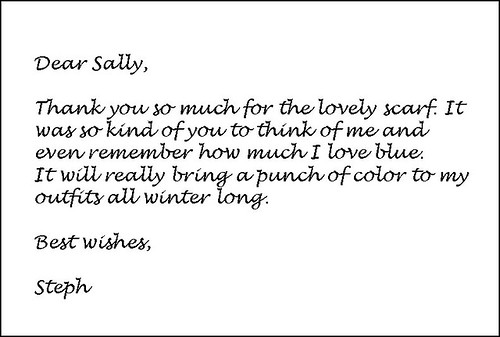
That's it! Here's a sample thank you for a gift of a scarf from a friend.
So now you are prepared to go forth and protect one bastion of politeness from being overrun and forgotten in our technology driven society. Pens and note cards at the ready!
Thursday, October 1, 2009
Fri-DIY

I have to admit, I love Halloween. So all of October's Fri-DIY's will lean heavily towards the most bewitching of holidays.
The pic above is from a girl's night Halloween party, which frankly sounds pretty cool. Better Homes and Gardens's slide show is chock full of great DIY ideas, from the hot pink pumpkins and skulls (break out that spraypaint!) to using cheap-o plastic skull rings as wine charms.

Green and creepy! Spooky terrariums made from old jars. These would be great grouped together on a mantel or entry table with some flickering votive candles.

Super awesome cobweb placemats and doilies! From Eddie Ross. Yes, he's obnoxious, but I give him his due for coming up with some great Halloween ideas.
 And on just a fall note, here's a pretty rustic centerpieces from Once Wed. Perfect for a fall table.
Parties - Easy Ideas from Real Simple

Real Simple has an informative slideshow about using 50 ordinary items in new ways. Normally I skip right over things like that, but this one is beautifully photographed and actually has some original tips. Some of them are kind of dumb (plastic bags around the knees while gardening?), but there were several helpful ideas for entertaining and decorating.
Pictured above it a 6-pack holder transformed into a picnic caddy for utensils and napkins. Cute idea for a picnic or barbecue. I could see taking this one step farther and gluing pretty paper to the sides and top.

Another great idea for a drink station at a party or barbecue. Put a colander filled with ice over a bowl to catch the water as the ice melts. I would probably use a wider more shallow bowl than pictured above as it looks a little precarious to have the colander floating mid-air.

This tip was to use rubber bands to keep cold glasses with condensation slipping out of your hand. Is this really a big enough problem that a helpful hint needed to be thought up? I like this idea for marking glasses at a party. A big bag of colored rubber bands would last a few parties at least!

I really liked this idea of using window clings for marking glasses as well. Normally, I tie pretty ribbons or paper cut outs to glasses to mark them, but what to do when using glasses without stems? One of these two tips will be put to good use at my next party!
Friday, September 25, 2009
Fri-DIY
More links from around the internet of great DIY projects!

Chalk board glasses. Perfectly clever and perfect for upcoming party season.

Adorable pom pom balls. I made a ton of these for a party a few months ago, so fun and easy. Start making a ton now and come Christmas use them on the tree, string together as garland, or use to decorate packages.

Awesome felt rosette pillow. Minimal sewing required.

Cool, easy pelmet boxes...made with foam core!! No jigsaw required.

Chalk board glasses. Perfectly clever and perfect for upcoming party season.

Adorable pom pom balls. I made a ton of these for a party a few months ago, so fun and easy. Start making a ton now and come Christmas use them on the tree, string together as garland, or use to decorate packages.

Awesome felt rosette pillow. Minimal sewing required.

Cool, easy pelmet boxes...made with foam core!! No jigsaw required.
Tuesday, September 15, 2009
Food - Rev up the freezer!

Great article over at Serious Eats on freezing the last bits of summer's bounty. Make the most of the last few weeks of the farmer's markets and stock up!
Tuesday, August 4, 2009
How To - Girly Coozies
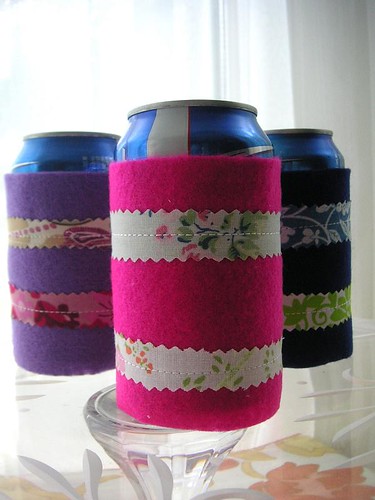
I have a new friend who recently complained that I hadn't made something for her yet. BUT things have been busy, so I couldn't launch into a huge project. I came up with these cute felt coozies as a super quick solution. They don't have bottoms to them, but we didn't have a problem with the cans slipping through when gave them a test run.
Materials needed:
8.5" x 11" pieces of felt, assorted colors
fabric scraps
rotary cutter
pinking shears
sewing machine
thread
Cut the felt into strips 8.5" x 4" using the rotary cutter. Cut the fabric scraps into strips 3/4" x 8.5" using the pinking shears. Layout 2 fabric scrap strips on to the felt and sew down. Fold the felt strip in half with the fabric strips facing in. Sew together with 1/2" seam. Flip coozie right side out and enjoy a frosty beverage!
Materials needed:
8.5" x 11" pieces of felt, assorted colors
fabric scraps
rotary cutter
pinking shears
sewing machine
thread
Cut the felt into strips 8.5" x 4" using the rotary cutter. Cut the fabric scraps into strips 3/4" x 8.5" using the pinking shears. Layout 2 fabric scrap strips on to the felt and sew down. Fold the felt strip in half with the fabric strips facing in. Sew together with 1/2" seam. Flip coozie right side out and enjoy a frosty beverage!
Saturday, July 18, 2009
How To - Fabric Garlands

I have long loved all things garland. Nothing says special occasion better than some pretty fabric or paper hanging from above, swaying gently. As an added bonus, garlands, banners, bunting, whatever you call it, packs a lot of decorative punch for relatively little DIY time and effort. There are lots of great tutorials out there. Here are a few simple ones to get started.


While this tutorial from craftstylish is technically for a mobile, it could easily be adapted to make a garland instead. Try one out for your next party, or make a pretty one for a new baby's nursery. Or just for yourself!
Tuesday, May 12, 2009
Home Style - Homegrown Flowers
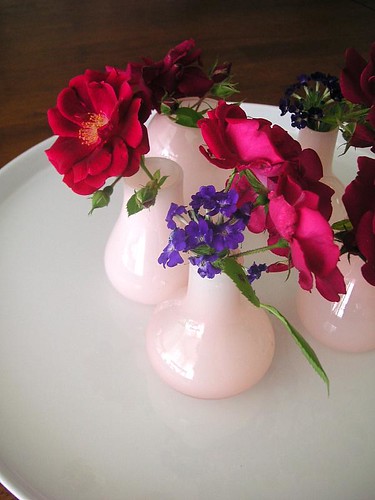
Spring is in full swing (couldn't resist) in my garden. Even though I have a black thumb and have tried to kill the roses in my garden, they come back even better every year.
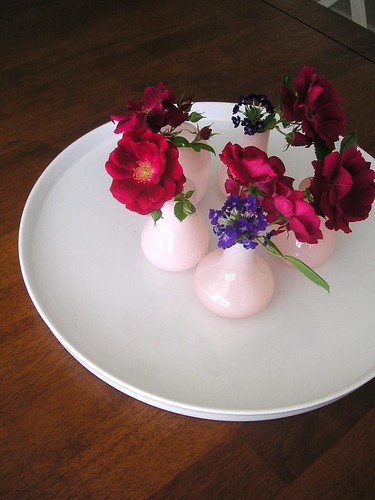
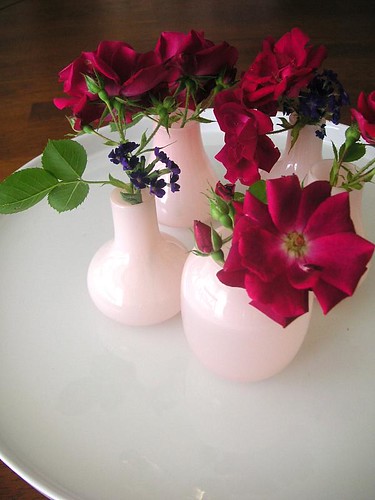
I snipped a few this past weekend and made a quick centerpiece for mother's day dinner for my sister. I love these little pink vases I originally bought for this party and I love them even more grouped together. A grouping of tiny vases is a handy trick. The small vases keep the flowers upright and you only need a few blooms in each for a lush looking arrangement.
Thursday, April 2, 2009
How To - Fabric Lined Envelopes
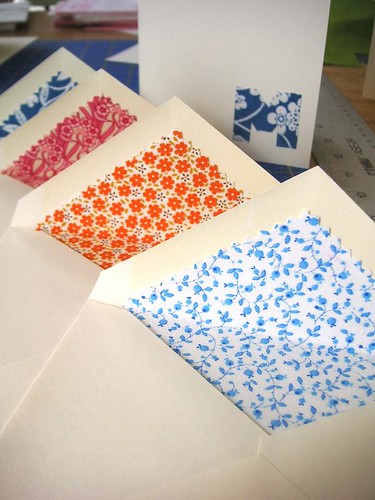
One of my best friends has a BIG weekend coming up - her birthday, bridal shower (I'm hosting, so more on that soon!), and bachelorette party all wrapped in three days. So, I made her a set of blank notecards for her birthday and lined them with cute fabric. The fabric is a little unexpected twist on traditional paper lined envelopes. I think they add a good dose of flair and style to any correspondence.

The process is pretty simple. Start by tracing the outline of the envelope with the flap open. Then cut out a template about 1/2 inch smaller than the envelope. Cut a piece of lightweight cotton fabric large enough for the template, I fit two per piece of fabric in the sample photos.
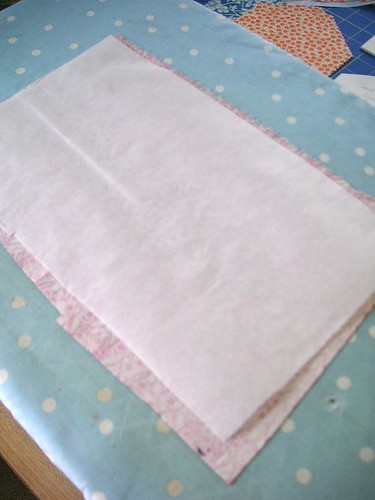
Next, cut a piece of paper-backed heat fusible fabric webbing (Wunder Under or the like, for lightweight fabrics) slightly smaller than the piece of fabric. Fire up the iron to medium-high and iron the fabric to get rid of any wrinkles. Let the fabric cool off, then place the fusible webbing rough side down on the wrong side of the fabric and paper side up. Press and hold the DRY iron in one spot fo 10-12 seconds to melt the glue to the fabric. Pick up the iron and move to the next spot and repeat pressing for another 10-12 seconds. Continue across the fabric in the same manner until all the webbing is fused.
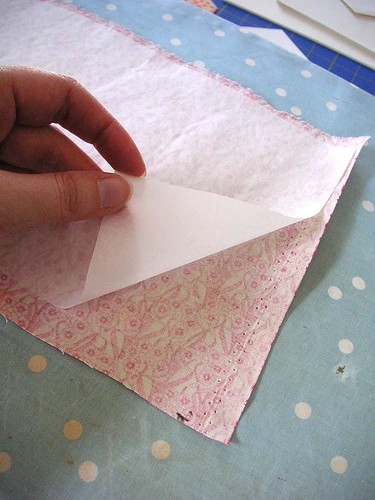
Let the fabric cool off to set the adhesive. Then carefully pull the paper backing away. The adhesive should be firmly attached to fabric and feel slightly rubbery.

Now, cut a piece of white tissue paper slightly larger than the fabric. Using the iron, repeat the pressing and holding to adhere the glue and fabric to the tissue. It will take a little less time than the first one, only about 5-7 seconds each pressing.
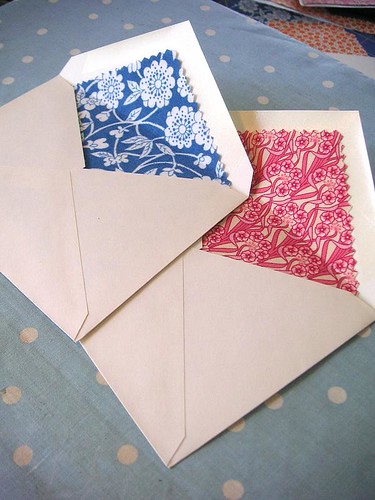
Now the fabric is offcially paper-backed and very very handy to have around. To finish up, trace the template made in step one on to the tissue side of the fabric and cut out. I used pinking shears just because I like them, but straight scissors will work, too. The fabric shouldn't fray because of the glue.
Open the envelope and insert the liner. Fold the fabric over exposing the flap of the envelope and run a glue stick over the area the liner will cover. Press the fabric firmly over the glue then fold the flap down to crease the fabric. Ta-da, all done. Mail at will!
Open the envelope and insert the liner. Fold the fabric over exposing the flap of the envelope and run a glue stick over the area the liner will cover. Press the fabric firmly over the glue then fold the flap down to crease the fabric. Ta-da, all done. Mail at will!
Friday, March 20, 2009
How To - Everlasting Flowers

It's officially spring time, and in my little part of the world, everything is blooming! Lovely, but it makes me sad that they last only a short time. Luckily, there are numerous great tutorials for making blooms that will never wilt or die. Above is from the very fun domestifluff.
 Of course Martha has her own marvelous ideas.
The lovely ladies at Vintage Glam Weddings have great instructions to make a pomander, which was from Martha, too, but has since been removed from her website.

Once Wed's always fabulous DIY section hit gold with these adorable fabric flowers. (You can see my attempt here.)

And last but not least, this cute topiary aptly named 'felt fabulousness on a stick' comes from lollychops!
Subscribe to:
Posts (Atom)